Archive for the DIY Category

$5 Eurorack Skiff

Posted in DIY, modular synthesizers, synthesizers with tags , , , , , , on April 12, 2014 by pyraphonic

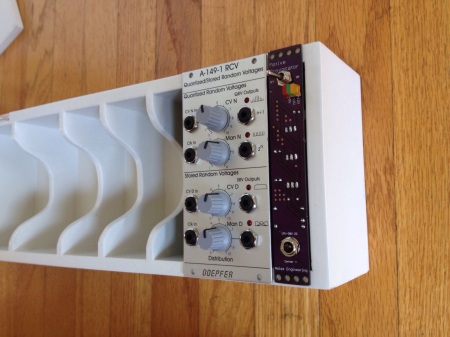
I recently picked up a few new eurorack modules and one of them (the Doepfer A-149-1) was too deep for my briefcase.

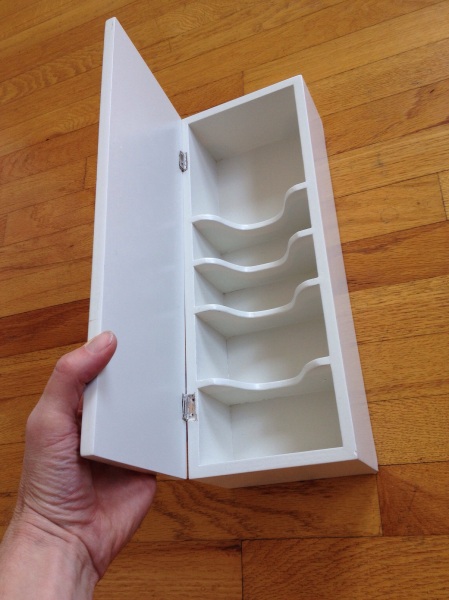
I needed a case to house it in, so I went to the thrift store today armed with measurements for a potential box. Incredibly, I found a perfect candidate for $5. I removed the lid, drilled a few holes and was done.

20140412-165930.jpg

20140412-165958.jpg

20140412-170055.jpg

20140412-170112.jpg
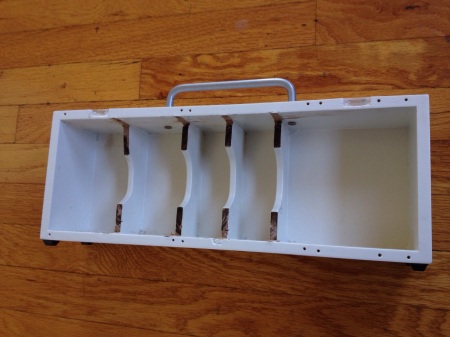
I’ve got room for more modules, but may need to contend with the dividers, depending on what goes in next.

Update**********

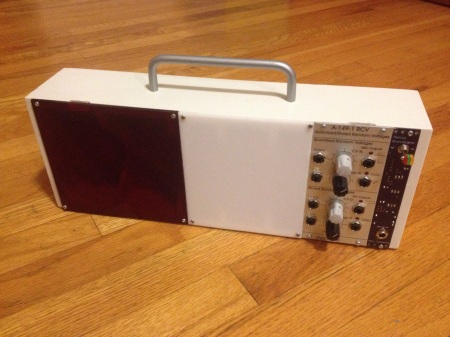
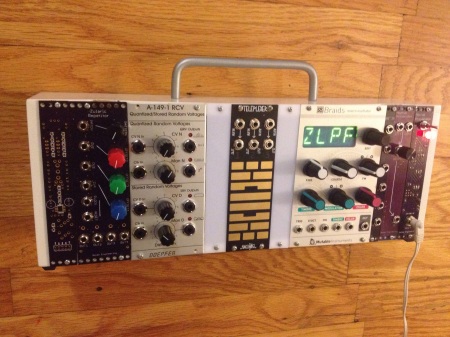
I couldn’t stop working on it and added some feet, a handle, and some blank panels.

20140412-233407.jpg

Update 2*************

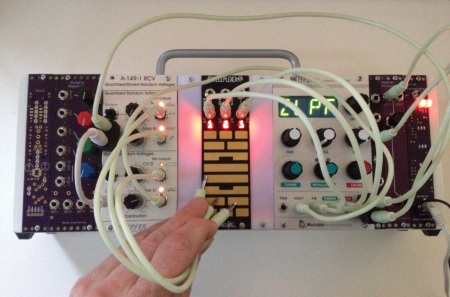
I busted out the dremel, cut down the spacers, and added the Make Noise Teleplexer and Mutable Instruments Braids for a fun little system. Also some Noise Engineering prototypes in there.

20140416-152210.jpg

20140416-152820.jpg

20140416-153019.jpg

In the Lab

Posted in Clark S. Nova, DIY on April 7, 2013 by pyraphonic

shakkn
Tinkering with some digitally transferred 4-track recordings from a different era. Possible temporal self-collaborations in the works.

Ovation Breadwinner Limited

Posted in DIY, Guitars with tags , , on April 7, 2013 by pyraphonic

breadwinner_yard

In the early ’90s I attended a guitar show in Ohio with a friend. I brought along a bag of odds & ends worth about $200 with long-shot hopes of trading for something better. Eventually I came across an Ovation Breadwinner Limited. The guy running the stand saw me looking at it and asked in disbelief, “you actually like that thing?” I showed him what I had to trade. The guy says, “yeah, I’ll trade you for all this”. He even threw in a gig bag. My friend’s eyes about popped out of his head when I strolled up and showed him what I had.

The pickguard was always a bit of a mess as someone had swapped the lead pick-up with a larger one and then put the original back in. They had hacked up the guard to get the replacement in. Years later, while using it for a project called A.M. Gold, I cracked it even more by accidentally putting stress on the jack.

breadwinner_pick_up_hack.JPG

breadwinner_jack

Recently I dusted it off and decided it was worthy of a make over. I found a guy on eBay that had Ovation new-old stock pick-guards for this model. I picked one up and re-wired it all from scratch with new components. I had never really cared for the active electronics in this guitar and it always seemed a lot quieter than my other guitars, so I gutted the active circuitry, wired the pick-ups as passive and it became a much better guitar in my opinion. After working on synthesizer circuits so much lately the guitar wiring seemed pretty trivial, which was nice. My favorite tone on this guitar is using both pick-ups but out of phase. I swapped out the knobs but still have the originals.

I’m quite happy with how it turned out. It is a really pleasant guitar to play.

breadwinner_main_b

Guitar Hero Controller-Turned-Instrument

Posted in DIY, synthesizers with tags , , , on March 6, 2013 by pyraphonic

IMG_6879

My 2 year old is really into music as well as my instruments, so I decided to make one for him. I took an old Guitar Hero controller bound for the scrap heap and added some simple circuitry and a speaker.

IMG_6876

I used a 555 timer circuit for the tone generator and used different resistors for each of the buttons so each one changes the pitch differently and they can be used in various combinations to get many different notes.

IMG_6872

Modular Modifications

Posted in DIY, modular synthesizers, synthesizers with tags , , on February 2, 2013 by pyraphonic

Today I made a couple modifications to my main modular synthesizer system. I recently sold a module I wasn’t really using so I had some space to fill.

IMG_0904

I have the 4MS Rotating Clock Divider, which I really like, and I decided I wanted to add the breakout expansion which is a panel with six switches that gives you more control options. There is also new software for this unit that you can buy on a chip and swap out in the RCD unit. To buy the wired up unit and upgrade chip as a set it would have cost me $95 plus California tax which would put me over $100. However, I saw on the 4MS site that you can get a kit for $50. But then I saw they also offer just the faceplate for $15 and the upgrade chip for $8 and I would only have to supply the switches and wiring. Shipping is just a couple bucks. I have switches here that I got at a surplus store for 50 cents apiece, as well as ribbon cable and a $1 connector, so I ended up making my expansion unit for under $30 plus about 30 minutes of work.

Here’s the RCD with the new chip swapped in.

photo 1

Here is the panel with the switches mounted and the ribbon cable and connector soldered to the switches.

photo 2

Next I just had to remove the jumpers and connect the panel. I realized today why jumpers are named as they are. It is because when you remove them they jump out of your hand, onto the ground and run to the nearest shadow.

photo 3

So far, so good – time to test it out.

photo 4

Success! Time to get clocking.

photo 5

The other modular mod today was to address a quirk on the Flame Tame Machine. The Tame Machine is a really elaborate voltage quantizer and beat looper. The quirk is that when the cv input goes above 5 volts the keynote value is affected and starts jumping all over the place. Likewise whenever the keynote input goes above 2 volts the patch value goes nuts. The work-around has been for people to attenuate their voltages before going into those jacks. I often send rows from Pressure Points modules and just try to keep the voltages low, but often accidentally cross into crazytown. I’d really rather not have to use up attenuators for these two inputs. I had thought that perhaps zener diodes of the appropriate value across those jacks would solve this issue but was not too keen on experimenting on a $400 module. Thankfully gimlay & jeannot on the MuffWiggler forum did the guinea pig work and posted their results. Thanks to them both! On to the mod…

photo 6

I ended up leaving more of the leads on the diodes than I needed to in case I ever want to remove them in addition to the fact that it was easier to solder that way with my helping hands alligator clamp holding the diodes in place.

photo 7

Another success! The Tame Machine has been tamed.

photo 8

Two projects without a hitch? I’m going to quit while I’m ahead today and just do some patching tonight.

Modular Synth Briefcase With Custom Ribbon Controller

Posted in DIY, modular synthesizers, synthesizers with tags , , , , , , , , , , on November 11, 2012 by pyraphonic

In an attempt to abate my lust for the impossible to find Buchla Music Easel* or the insanely expensive EMS Synthi, I’ve put together a modular synthesizer using a slim vintage Samsonite briefcase as the housing.

It sits nicely on a laptop stand, a keyboard stand or my lap.

The space above the modules holds the wall wart power supply, the cables, and a bag of adapters when packed up. I may eventually add small speakers up in each corner like the Synthi has. The handle makes a nice cable holder when in use.

I went with eurorack modules to compliment my other modular system. Tiptop Audio 84hp rails fit almost perfectly into the case; I just had to file the ends to fit the contours of the case better. So far it has a Flight of Harmony Choices joystick, a Make Noise DPO, a Make Noise Optomix, a Random Sequencer Turing Machine, a Noise Engineering Ataraxic Translatron (an amazing prototype module from a genius friend of mine I am beta testing – next to that is an empty board from a different prototype), a custom plate with a square wave LFO to run the Random Sequencer and a mono-to-stereo converter with attenuation for output, Tiptop Audio uZeus power and lastly a custom plate with a force sensing resistor and ribbon controller. It is a fun stand-alone unit but also compliments my main system nicely.

The ribbon plate was built with help from friends. I made a template of the layout and Stexe from Slithis made the support beams, cut the plate and made the holes for me in his fabrication laboratory.

The schematic was laid out by my electronics mentor and the same guy who created the Ataraxic Translatron in my case, Stephen McCaul. First I added wires to the sensors, jacks and pots on the plate.

Then I did all the rest of the circuit by gluing the chips to a plastic piece and adding the components like a little electronic sculpture.

Then I wired it all together and was amazed that it all worked on the first try.

The plate is laid out like this: the force sensor has a scalable CV output and a gate out with a threshold pot. The ribbon has a scalable CV output and the two red buttons add positive bias and the black add negative bias to the ribbon output, so they can be used to jump up in pitch or jump down in pitch. The bias buttons each have a trim pot on the board so they can be calibrated as desired. There is also a gate out from the ribbon with a pot for the threshold. The ribbon works best for me when scaled to two octaves. And with various buttons engaged I can go up an octave or down an octave, giving me a four octave range. I mainly use it with the ribbon output to the DPO 1v/oct input and the force sensor output to the Optomix cv input.

Here is a test flight of the ribbon controller as I get a feel for the ribbon and using the bias buttons:

Next time you see a guy with a briefcase it might not be what you think.

*Buchla expert Mark Verbos told me at a Trash Audio event that plenty of other Buchla modules can do what the each of the functions of the Music Easel does but even better, but that system in that case still has for me what Captain Beefheart called “cootie appeal”; it’s too cute to not want one.

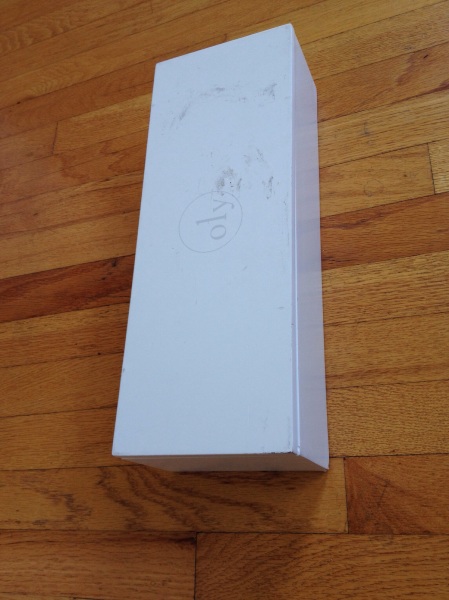
Stereo Spring – A Modified Space Phone

Posted in DIY on November 3, 2012 by pyraphonic

This was a quick and easy project with a lot of sonic payoff for very little investment. I’d often wondered what this toy called the “Space Phone” would sound like in stereo, so I took 2 piezos and affixed them to each end of the spring and added 3.5mm jacks to the outside housings.

To test it, I ran the signals straight into a Zoom H2 hard panned via a cable splitter.

Listening with headphones will maximize the stereo effect.

I’ve since used it through my modular synthesizer with heavy delay processing via the Tiptop Z-DSP module in a Slithis track which can be heard here:

Flexus

Now I need to figure out an elegant way to do this with a Slinky.

DIY – The Black Box Series

Posted in DIY, modular synthesizers, synthesizers, The Black Box Series with tags on June 10, 2012 by pyraphonic

I’m often in need of simple, dedicated circuits and out of utility, a recurring format has emerged. The Black Box Series is a growing set of utility boxes I have been making to augment my set-up and simplify signal/work flow.

These are all using Radio Shack’s tiniest project box.

One houses a meter that I found at a surplus store that was conveniently labeled “control voltage” so I used a resistor that sets +10/-10 volts at the extremes and use it to analyze control voltages on my modular synthesizer.

Another is a box I made to attenuate the output of my modular synthesizer. Rather than carry around a small mixer for this purpose, I built a stereo 1/8″ in/out attenuator. I usually send my signals to my Tiptop Audio Z-DSP at the and of the chain and come out stereo, then go through this box before going into a recording device.

The third is a box I made that allows my modular synthesizer to interface with an unmodified Synsonics drum machine.

Long ago I found a website that showed the pin outs for the 5 pin din socket on the Synsonics and this is clearly NOT a MIDI port. It has contacts for a footswitch accessory but I have made a box that just maps all four inputs/outputs to jacks. These functions are: Bass drum trigger in, high hat close gate in, bass drum trigger out, and 16th note trigger out. All super useful for modular use. I added an LED to show the kick drum trigger output. Above shows how I have it set up along side a Radel Digi-100 Plus tabla drum machine, which also accepts a voltage trigger input (it is meant to be used with another Radel product, but I have had luck using a fast clock trigger from my modular).

I should note that the bass drum and high hat trigger inputs are set up for footpedal use, so they are triggered when the positive pin goes to ground (when the circuit is closed, i.e. a connected footpedal wired ‘normally open’ is pressed). These will not accept a standard modular trigger pulse and behave as expected, but could be modified to do so. They will work with a gate, but the trigger occurs when the gate goes low, so it’s a little tricky.

Below is a short video of the test I did right after finishing the box: